Try our Soap Recipes for Making Homemade Soap with easy, no-fail Recipes
Try these soap making recipes for handmade soap. If you missed the first page to this topic visit the how to make soap page which will give you an introduction to soap making, the equipment you need and the precautions you need to take when using lye.
Once you gain confidence in your soap making you may want to be adventurous and start adding new ingredients to your basic soap recipes. However, you will soon learn that not everything will work and end up being successful. For example, if you are thinking of adding some of your favorite fruit, don't, because it just won't work.
What you can add is an ounce or two of additional oils at the end of the soap making process, just before putting the soap in moulds. This is a superfatting agent that is an oil in excess of the oils or fats used in the recipe. Just mix it thorougly. This is also the time to add any scents or perfumes.
Another way of adding something special to your soap recipes is to make a tea of the plant you want to add. In this way you will get the properties of the plant but you won't get the scent. The way to use this 'tea' is to subsititute some of the water with the tea when dissolving the caustic soda.
To make the plant tea for soap recipes:
Some soaps can be made to suit different skins and hair colors.
For dry skin: Use a tea made from acacia or clover
For oily skin: Use a tea made from roses or cucumber
For blondes: Use a tea made from chamomile or marigolds
For brunettes: Use a tea made from raspberry leaves or rosemary
For putting the red back into black hair use a tea made from stinging nettles.
To make an astingent soap use chamomile or raspberry leaves.
Hand Milled Soap Recipes
The hand-milled homemade soap recipes allow you to make soap without coming into contact with lye. So, effectively, you are making no lye soap, although technically, it had lye initially to cause a chemical process resulting in soap as a finished product. So, for those of you who would like to make your own soap without using lye are a raw material, these soap making recipes are the answer. They are soaps that are created using store-bought, unscented, white bars. Baby soaps are perfect for this.Each recipe is different, however, as a rule of thumb, you should add 1 cup of water to every 2 cups of shaved soap.
If you want to, you can also melt the soap in a microwave. However, do this carefully. Heat on low, or if you want to use full power, only do so for a few minutes at a time, and stir in between each time you take it out.
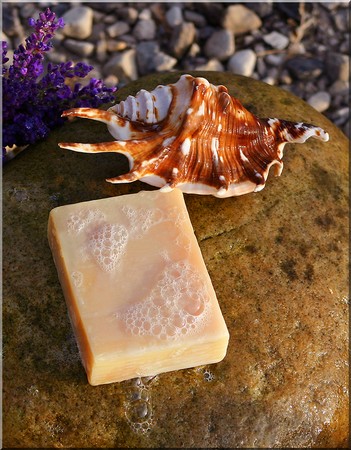
HAND-MILLED SOAP MAKING RECIPES for SAGE SOAP
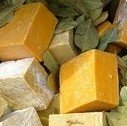
 Photo
by Malene
Thyssen
Here is a soap that you can rebatch, call your own and here you are making soap without using lye or caustic soda. Therefore it is safe, fun and can be used for kids crafts too.
Grate 2 cups of your chosen store-bought white soap, or your homemade Castile soap
Place grated soap in a heat-resistant glass bowl
Add 1/4 cup of water
Take a pot of water simmer over a low heat. Place bowl over the pot of simmering water and heat gently until melted. Do not stir, although you will be tempted. If you do, you will add bubbles to your soap that you don't really want.
Remove from heat and add 1/4 cup rubbed sage. Fold in carefully to mix in ingredients without adding bubbles.
Take a suitable mold, such as an ice cream box, which as been pre-smeared in a thin coating of petroleum jelly to ensure that your soap will be released easily.
Pour your soap into the mold and place in fridge to set.
Once set remove from fridge and release from mold. Place on a cake rack for 3 weeks to dry completely.
Once your soap is dry, cut up your bars accordingly and wrap as desired.
This is a basic homemade soap recipe that you can then use to substitute sage for oatmeal, add a teaspoon of saffron or paprika for coloring etc. Just remember that food colorings are not suitable color additives for making soap.
HAND-MILLED SOAP MAKING RECIPES for OATMEAL and HONEY SOAP
1/4 cup oatmeal
1 tablespoon honey
1 teaspoon almond oil
Make this soap using the same homemade soap recipe as above.
ANOTHER HONEY SOAP RECIPE
1/4 lb honey
1 oz glycerine
few drops of perfume of choice
2 tablespoons fine oatmeal
This is a good soap recipe that makes the skin lovely and soft.
Grate the soap and add enough water in the pot to melt the soap without burning it. Add the honey and the glycerine, the perfume - I like sandlewood with this soap - and the oatmeal. Mix altogether until soap is dissolved. Boil for 3 minutes and then pour into a deep wet container or soap moulds. When quite cold, cut into pieces and leave out until quite dry before storing.
SAND SOAP FOR GARDENERS AND WORKERS
1 lb Castile soapfine sand
2 teaspoons eucalyptus oil
Grate the soap. I use my own Castile soap made from olive oil that I have made previously. Place in a saucepan with just enough water so that it doesn't burn. Add as much fine sand as the soap will hold. Add the eucalyptus oil. Boil for 2 minutes and pour into moulds. Leave to dry slightly. Cut into bars and allow to dry out before storing.
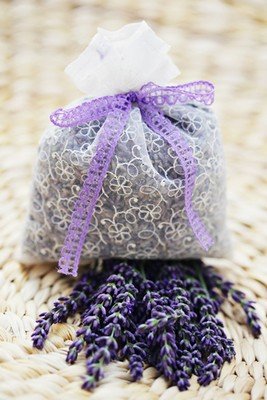
HAND-MILLED LAVENDER SOAP
Place the bowl in a pan of hot water and stir until smooth.
Crush about 1/2 cup of dried lavender flowers and remove the bowl from the pan.
Add the dried lavender flowers to the soap.
Put a few drops of lavender oil to the mixture.
Now mold your soap and wait for it to dry before using.
This soap doesn't need to cure.
SOAP MAKING RECIPES for BEGINNER'S SOAP
Here you will be using small quantities to start off with, so if you mess it up it's no big deal. Remember, that for your soap to be successful you have to measure your ingredients accurately, make sure that both the temperatures of the lye water and the oils are at 95°F when you mix them together, and that the soap has been sufficiently mixed together so that it has reached the 'trace' stage. When the spoon is dragged through the soap mixture and it leaves an indentation for a few seconds, your mixture has began to turn to soap. This can take from 10 minutes to an hour of mixing.
6 oz olive oil
5 oz vegetable shortening
2.6 oz lye
1 cup water (8 fluid ounces)
Using your safety glasses, and gloves, carefully combine the lye and water in a glass jar. It will heat up fast, so be careful.
Stir until dissolved and then place the lye in a sink full of ice and water to get it to cool to 95°F.
Melt the vegetable shortening in a stainless steel pot over a low heat. Add the coconut oil and the olive oil. Mix well and heat to 95°F.
Make sure that both the lye water and the oils are at 95°F. Now add together carefully, stirring constantly until the mixture begins to trace.
Pour into molds and leave for 24 hours. Release from molds, cut into bars and leave on a wire rack for 3 - 4 weeks to harden. This recipe makes about 5 bars.
Variation:
Add 2 tablespoons of oatmeal
after the soap has reached the 'trace' stage. Mix thoroughly and then
pour into molds as usual.
SOAP MAKING RECIPES for a SMALL BATCH OF SOAP
It is also an excellent recipe to use when you are more advanced in your soap making and are looking to experiment with additional ingredients and fragrances.
This soap recipe will make 1 bar of soap.
Mix 5 teaspoons of lye with 1/2 cup of water. Add 1 cup of lard, and whatever extras you may wish to add.
Follow the instructions for making soap.
SOAP MAKING RECIPES for CREAMY CASTILE SOAP
Castile soaps are so called, because the main oil that is used in these soap making recipes is olive oil.
6 oz lye
16 oz olive oil
8 oz coconut oil
17 1/2 oz shortening
Not forgetting your safety glasses and gloves, mix the water and the lye in a large glass bowl or stainless steel pot. The water mixture will get very hot, so take care.
Heat the oils and the shortening over a low heat, stirring often. Heat to about 95°F. This will take about 30 - 40 minutes.
Check the temperature of both the lye water and the oil mixture as both should reach about 95°F at the same time. If one is hotter than the other, place in a sink of cold water to get the temperature down to match the other.
Once the temperatures are even then add the lye to the oils, stirring constantly.
From 10 minutes to an hour of stirring, the mixture should begin to 'trace'. This means that when a spoon is dragged through the mixture, an indentation is left behind for a few seconds. If you do not stir your soap to the point of tracing, then when the soap is poured it will separate into levels of lye and oils, and your soap will not be successful. Once tracing has been reached this is the time to add any herbs, plants or essential oils to your soap, if desired.
Pour your soap into suitable plastic molds, cover with lids and wrap in a heavy blanket for 24 hours.
Once the soaps have hardened they should leave the the molds very easily. If you have trouble, in the future you can use a thin coating of Vaseline on your mold to help with the un-molding process.
You can cut your soap into smaller bars at this stage and leave on a wire rack for 3 - 4 weeks to air dry and harden.
SOAP MAKING RECIPES for ALOE VERA SOAP* Based on the recipe above
2 tablespoons aloe vera gel
1 1/2 tablespoons rosewater
30 drops evening primrose oil
6 drops tangerine essential oil
4 drops juniper essential oil
Take a flat baking tray and line the base with waxed paper. Set aside.
In a glass bowl mix the aloe vera gel, the rosewater and evening primrose oil and leave overnight.
The next morning beat the mixture thoroughly. Add the essential oils drop by drop, mixing well after each addition.
Wet your hands, and taking a small amount of mixture ( about 1/3 of a cup at a time) form it into balls.
Place the balls on your baking tray that has been lined with waxed paper.
Leave until dry and firm.
SOAP MAKING RECIPES for COCONUT SOAP
20 oz coconut oil
4 oz olive oil
12 oz lard
20 oz water
6.5 oz caustic soda
The caustic solution is adjusted to 75 F. and the fats to 85 F. Some oil of coconut can be used if desired at the end.
SOAP MAKING RECIPES for TRANSPARENT HONEY SOAP
175 g caustic soda
1.1 kg tallow or fat
50 g honey
225 g coconut oil
2 tablespoons sugar "burnt" so that it caramelizes for the colouring.
Follow the same soap making process below for the Hard Laundry Soap Recipe, adding the honey and coconut oil to the tallow as it melts.
Variations on the above soap making recipe:
Add a few drops of perfumed oil to the soap just before you pour it out.
Add half a cup of powdered milk to this homemade soap recipe just before you pour it out for a very smooth, rich, moisturizing soap.
Add half a cup of honey just before you pour it out for a rich, clean soap
Add chamomile or parsley tea, or tea made of calendula petals and hot water instead of water in the recipe - these are all soothing herbs which make a mild soap.
Replace part of the oil with avocado or almond oil for a very rich moisturizing soap.
SOAP MAKING RECIPES for HONEY BAR
This recipe is for those of you who are not up to speed on the metric system. I was one of those who was brought up with both the Imperial and the metric system, so can happily work with both. However, I do understand that it can be frustrating for those who are not that fortunate. So here is the recipe that is almost the same as the one above.
20 oz distilled water
6.5 oz caustic soda
40 oz tallow
2 oz honey
8 oz coconut oil
burnt sugar coloring, not over 2 ozs.
Using the normal soap making process add the caustic soda to the water and adjust to 110F. heat the fats to 98 F. Add the honey, coloring matter and scent if you are using any just before pouring into the moulds.
To make the burnt coloring, place 1/2 lb. sugar into a frying pan and heat until it turns black and flaky. Take off the stove and pour a cup of water over it. Stir the mixture for 5 minutes, strain through a gauze and keep in a bottle for later use.
SOAP MAKING RECIPES for TRANSPARENT BROWN SOAP
17 oz water
6.5 oz caustic soda
6 oz brown sugar
14 oz glycerine
12 oz 80% proof vodka
20 oz lard
10 oz coconut oil
Dissolve the brown sugar in the vodka and add the glycerine. When completely dissolved, add to the caustic soda solution and adjust to 90 F.
Melt coconut oil and lard together and adjust to 90 F. and make soap in the usual way. This soap must be covered quickly when poured and should not be disturbed for at least 24 hours. The transparent appearance will be completed by aging the soap.
SOAP MAKING RECIPES for SANDALWOOD SOAP
1/2 oz Sandalwood powder
14 oz tepid water
6 oz lye
18 oz coconut oil
6 oz palm oil
12 oz olive oil
4 oz wheat germ oil
Combine the Sandalwood oil and powder together and set aside.
Blend the water and lye together carefully. Set aside and cool to 95°F.
Gently heat the coconut oil and palm oil together over a low heat. Add the olive oil and the wheat germ oil and then heat to 95°F.
Once the temperatures are the same, mix the lye water into the oils.
Stir the mixture until it reaches the 'trace' stage. Now add the Sandalwood mixture. Stir thoroughly and put into suitable molds.
Leave the soap to set and solidify for about 24 hours. Release the soap from the molds, cut into bars and place on a wire rack to air dry for 3 - 4 weeks.
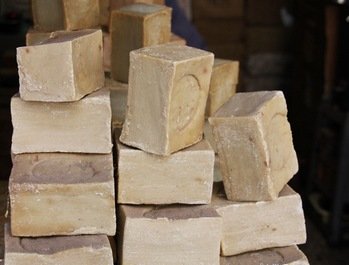
Homemade soap on display
SOAP MAKING RECIPES for COLD LAUNDRY SOAP MADE WITH COMMERCIAL LYE
1 can lye (14-16 oz)
1 quart water
1/2 cup ammonia
2 tablespoons borax dissolved in 1/2 cup water
Carefully combine the lye and water in a glass jar. It will heat up fast, so be careful.
Stir until dissolved and then place the lye in a sink full of ice and water to get it to cool to 98°F.
Cool the melted beef fat in the same manner to get it down to 98°F too.
When the right temperature has been achieved, add the lye solution into the beef fat and stir well.
Add the ammonia and the borax and continue to stir until it is thick; like honey.
Pour into wooden mold or a glass baking pan that has been coated with a light coating Vaseline to prevent it from sticking.
After 24 hours, cut into bars and allow to harden in a dry place. Grate and use after 3-4 weeks.
SOAP MAKING RECIPES for HARD LAUNDRY SOAP (Makes 6kg)
This homemade soap recipe uses caustic soda, so please take the necessary safety precautions.
3 kg clean fat, or olive, coconut, sunflower oil, or a combination.
2 litres of cold water or herbal tea
Weigh the caustic soda with gloves and goggles on. Pour water or herbal tea into a jug and add the lye, slowly. It will bubble and heat at this stage, so take care. Set aside to cool while you are measuring the fat.
Melt the fat if necessary, or heat oil to 30 degrees centigrade. The lye (caustic soda / water mixture) should also be at 30 degrees centigrade. Pour the lye into the fat or oil, stirring continuously until well mixed and sponification takes place. This can take as long as 20 minutes or more. When the mixture becomes thick and opaque you have reached that stage. Stop stirring!
Both the lye and the oil need to be at the same temperature or the soap will separate.
Pour mixture into molds and cover with a blanket to stop it cooling too quickly. If an oil film develops on the top, stir again; you may have to do this several times. Soaps made with oil are more likely to react in this way and separate.
After 4 weeks, cut the soap into bars.
It should be firm, but not hard at this stage. Now allow to dry and
harden for at least another month before using.
SOAP MAKING RECIPES: LAUNDRY SOAP
2 gallons water
0.5 pound resin
2 ounce powdered borax
1 pound caustic soda
1 bottle cloudy ammonia
Put fat, water, resin and borax into large pot and heat thoroughly until the fat has melted. Remove from heat and add the caustic soda very carefully adding just a little at a time as the mixture will rise up each time you add some caustic soda.
Return to heat and boil gently for 2 hours. Stir with a wooden spoon taking care that the mixture doesn't boil over. Remove from heat, and in a well-ventilated room add the ammonia. Mix well and put mixture into molds. Leave for 24 hours before cutting into bars.
SOAP MAKING RECIPES: QUICKLY MADE SOAP
This recipe is very similar to the one above. The difference here is the addition of bicarbonate of soda and where you have to boil for 2 hours in the recipe above, in this soap recipe you only have to boil for 20 minutes, thus its name.
The caustic soda can be poured directly from the tin straight into the cold water, being careful not to splash your hands. It only boils up when added to boiling water.
6 pounds rendered down mutton fat
14 pints water
1 pound caustic soda
0.5 pound resin
Heat over low heat until fat has melted.
Now add 2 teaspoons borax
2 teaspoons bicarbonate of soda
Boil
for 20 minutes. Pour into moulds and allow to set, and then cut into
bars. This soap can be used for washing dishes, showering, bathing or
even washing your hair.
Old Fashioned Country Soap Recipes
Old Fashioned Citrus Soap
1/2 gallon water
8 lb grease
citrus leaves (optional)
Place the caustic soda into a pot with the 1/2 gallon of water. Stir well with a flat stick. The mixture will heat up. Put aside to cool.
Melt 8 lb lard or animal grease free from salt and allow to cool until the fat is still warm and still at the liquid stage. Now pour the lye mixture into the fat mixture. Make sure you add the lye to the fat, and not the other way around!
Pour the lye in steadily, stirring all the time. It should look like honey in about 2 minutes. If not, stir until it does. Pour into moulds to set. Afterwards you will have 16 lb of good soap.
If you would like your soap to smell nice, take some citrus leaves, and boil with the water that you will use with your caustic soda. Remove before adding the caustic soda.
Old Fashioned Copper Kettle Soap
- 12 pints water
- 1 lb caustic soda
- 1/2 lb crushed resin
- small packet soap flakes (no quantity given)
- 1 tablespoon borax
- 7 lb clarified fat or lard
Add the caustic soda to the water and add all the other ingredients to the pot. Boil altogether, stirring constantly, until the mixture starts looking like honey. Pour into molds and wait for it to set.
SOAP MAKING RECIPES for HOMEMADE SOAP WITHOUT LYE or CAUSTIC SODA
Besides the milled soaps that have been reworked and rebatched, you can also make soap without lye using other ingredients as you will see from the soap recipes below.Unfortunately, the recipe calls for large amounts of the ingredients, but if you want to try these you will have to adjust them accordingly.
Soap Recipe without Lye
3 lb lime (calcium hydroxide)7 lb fat
1 lb resin
3 gallons water
6 lb washing soda
3 tablespoons borax
Place the lime, washing soda and water in a large suitable pot for soap making and boil for 1 hour. Remove from the stove and leave overnight.
The following day, drain off the clear liquid that has risen to the top and place in a separate container.
Add the fat, resin and borax to the clear liquid that you have just drained off. Boil for 3 hours, stirring all the time.
You must stir the mixture, and this is a very important part of the process which will make excellent soap.
Second Soap Recipe without Lye:
3 gallons water3 lb fat
3 lb lime
3 lb washing soda
1/4 lb resin
Boil the water, lime and washing soda for 2 hours. The allow to cool. Pour off the clear liquid into another pot and and add the resin, crushed to a powder. Boil for another 3 hours, stirring well. Remove from heat and place in your molds to allow to set.
Third Soap Recipe without Lye:
3 kg fat5 tbsp borax
3 tbsp kerosene
1 tbsp resin
Mix together half a kerosene tin of clean wood ash with 1 kg of lime and 2 3/4 kg of washing soda. Boil this in one kerosene tin of rain water for 1 hour.
Stand overnight, well covered with hessian bags.
In the morning strain, place in a clean vessel, add fat, borax, kerosene and resin. Boil for 3 hours stirring often.
Pour into wetted mould, and when cold cut into bars. Store to dry for one month before using.
Fourth Soap Recipe without Lye
3 lb lime6 lb washing soda
1 lb resin
7 lb fat
3 tablespoons borax
12 quarts rain water
Boil water, lime and washing soda for 1 hour. Leave to stand overnight. Pour off the clear liquid and place in a new pot. Add the rest of the ingredients to the clear liquid and boil for 3 hours, stirring constantly. Pour into molds and allow to set.
Lemon Shower Gel Recipe
4 oz Castile Soap Shavings3 oz glycerine
20 drops oil of lemon
20 drops oil of lime
1 pint distilled water
Place soap and water into a double boiler over hot water. When melted add glycerine, remove from the heat and add the oils. Keep in plastic bottle for use in the shower.
Seed and Soap Spice Balls (Makes 8)
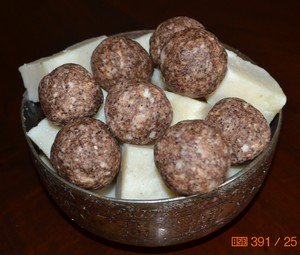
These are great soaps to make, firstly because they can be made for cheap and novel gifts, and secondly, even the kids can get involved.
5 tablespoons water
5 tablespoons olive oil
1 tablespoon ground cinnamon
1 tablespoon ground ginger
1 tablespoon poppy seeds
1 tablespoon sesame seeds
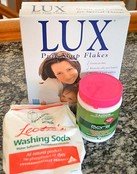
Place the soap flakes - such as Lux - into a large bowl, adding the water and the oil. Mix these ingredients with a spoon. Know knead the mixture with your hands until it resembles play dough. Divide the soap 'dough' into 16 portions by scooping out a rounded tablespoon of soap mixture for each portion, shaping each portion into a ball.
Place one tablespoon of each of the seeds and spices into 4 separate bowls or saucers. Quickly dip a soap ball in a small bowl of cold water then roll it between your hands to evenly wet the surface. Now drop the soap ball into the sesame bowl, dry your hands then spin the bowl around to coat the soap ball evenly with sesame seeds. Roll and press the seed-coated soap ball between your hands to 'fix' the seeds. Working with one seed or spice at a time, repeat this step to coat the remaining soap balls.
These soaps do not need to cure.
HOW TO USE YOUR SOAPS
The most economical way to use soap is to wet the hands and rub them together around the dry soap bar. Return the soap to the dish and rub the hands together to get a good lather. We often waste our soap down the drain, so just another way of being frugal!Well, we hope you have enjoyed reading our soap making recipes and feel inspired to try some out yourself. If you have any problems drop us a line through our Craft Forum. We would love to hear from you.
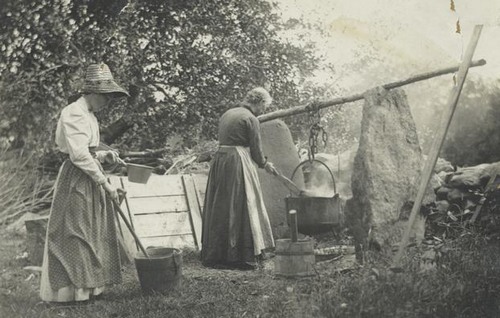
Photo courtesy of NY Public Library.
Other Resources you Might Like to Look At
Go to How to Make Homemade Laundry Soap Detergent
Go to the Saponification Chart
Go to Make Lye from Wood Ash
Go to Country Crafts
Go to Self-Sufficient Living
Go to Frugal Living
Soap Kits and Lye for Making Soap
You can Add your own Comments, Tips and Ideas on Soap Making Recipes Here!
We have lots of pages where you can contribute to throughout this homesteading website. We love hearing from our readers, and hope you will be one of those we hear from too. Look around our homesteading website. If you have some comments, tips, recipes or ideas on soap making recipes of your own, please submit them. All you need to do is type and submit. We will do the rest!
Leave a Comment
Do you have anything that you would like to add after reading this page? We would love to hear your thoughts. If you can add additional information to what has been written here you will be adding value to the website! No need to have any special skills - just type and submit. We will do the rest!
Other Comments
Click below to see comments from other visitors to this page...
Heat
and Pour ![]()
![]()
![]()
![]()
![]()
Hello the house. I made some heat and pour glycerin soap and it dried
very hard and does not lather very much but appears to clean. Is this
normal for ...
Using
Avocado Oil in Making Soap ![]()
![]()
![]()
![]()
![]()
Hello, I want to use Avocado oil in my soaps. Is avocado oil a good
moisturizing oil? And if it is, when is it added at trace or melted
along with the ...
milk
moisterizing soap ![]()
![]()
![]()
![]()
![]()
Hello,
I
really want to start making my own soap. I would like to know if you
have a milk moisterizing unsented soap recipe that may include some ...
Stove
method for soap making Not rated yet
Stove method..., just so excited!!!! Any help with that, as I'm excited
to use finished product sooner than 3-4 weeks. I will try the cold
process. Great ...




New! Comments
Do you have something of value to add? Leave me a comment in the box below.