Growing Apple Trees: Heirlooms, Dwarf, Crab, Pruning, Spraying
Growing apple trees can
be a rewarding experience but with over 1000 varieties which one should
you
plant? There are heirloom apples and apples that are green, yellow or
red. Apples that are short lived or long lived, or those suitable for
eating, cooking or for making cider. Which one should you choose?
In the end it comes down to where you live and what you want to do with the apples. However, whatever variety of apple tree you decide to plant, always buy two, even if they are self-pollinating, as they will definitely end up giving you more apples as a result.
Growing apples successfully means having the correct climate. Our
winters are cold and on our farm fruit trees flourish especially stone
fruit. If you have a cold climate where you can grow cherries for
example and other stone fruit you will also be able to grow apples.
It is spring now, as I write this article and my apple tree is just finishing its blossom. Beautiful sprays of delicate pink flowers appeared on the bare branches of the tree and in just a few weeks the flowers started disappearing and the leaves have started to emerge.
I was happy to see a number of bees and bumble bees in the flowers doing their thing for pollination, so I hope to have a good crop this year. Although we had time to prune out the dead wood, we weren't so quick on the mark for a good pruning, so no doubt the apples will be bountiful if not small. Hopefully, if I do some thining out as soon as the fruit appears, I may be able to save the situation.
If you live in a warmer climate you can try growing good old Granny Smith apples which have a lower chilling requirement.
When growing apples find a sunny location which gets at least 6 hours of sun a day. This is essential if you want to be successful. I had read in the past that apples like to grow in soil that is well-drained. Well, we have clay, lots of it. It's a grey soil with a lot of stone and when it rains that clay retains a lot of moisture. And you know what? My apples and cherries love it!
Since then I have also learned that clay is good for pears and grapes, hay, wheat, oats, beets, cabbages and turnips. So don't be too hasty in getting rid of your clay soil and treating it with lime as one traditionally would. Clay soil makes great pasture and is also loved by my dandelions, nettles and sorrel.
Step 2. For fruit trees you should dig a hole 4 feet in diameter and 2 feet deep for excellent growth. Add some compost and well rotted manure into the soil that you removed from the hole. Mix well to prevent the manure from burning the roots.
Step 3. Check the planting depth by standing the apple tree in the hole. Lay a stake across the top of the hole. The graft union should be just above the soil surface and level with the stake.
Step 4. Take the apple tree out of the hole, adjust the level of the soil if necessary and make a mound of earth in the base of the hole. Stand the apple tree on top of the mound. Make sure that there are no air pockets around the roots. The height of the mound should be adjusted so that the bud union (where the scion is budded onto the root stock) is slightly above or at soil level.
Back-fill the hole carefully with the soil that was removed from the hole. Firm the soil around the roots as you go. Apple trees like compacted soil and don't do well in loose soil at all.
Step 5. Water the apple tree well, adding more soil afterwards if necessary.
Do not add any fertilizer to the apple trees at this stage. Be patient and wait for the tree to show signs of growth before feeding.
You can cover the soil with some organic mulch. However, do not put it on or too close to the trunk as this will encourage disease.
If you want to save yourself some money you can buy 1 year old apple trees and plant them close together in October on a suitable piece of ground. A year later you can then remove the trees and plant them out into the orchard in their permanent position.
But watering young trees is important in the beginning as well as when the fruit is forming in the spring and early summer (or autumn for late maturing varieties) when the next season's buds are forming.
Fruit trees in general need nitrogen, phosphorus and potassium in addition to other minerals and trace elements.
In October top dress your apple orchard with a layer of compost and farmyard manure.
The compost will provide the much needed phosphorous. The manure, especially chicken manure, will provide the nitrogen needed for good leaf growth.
Using wood ash from those previous winter fires can be applied to your compost to give your trees the potassium your apples need. Apples need more potassium than other fruit trees.
Make sure that any manure and compost that you use on your trees has been well rotted and is no longer hot.
Getting the spacings right is also another thing to take into consideration. If you are going to prune your apple tree into a pyramid shape then you should plant your apple trees 10 feet apart. However, if you are going to prune them in the conventional umbrella shape then you should plant your trees 20-30 feet apart depending on the variety you have chosen.
Because apple trees take such a long time to mature, it makes sense to intercrop your apples with vegetables, stawberries, currants or gooseberries until your trees mature.
Summer Apples
* Red Astrakhan
Autumn Apples
* Gravenstein
* Wealthy
Early Winter Apples
* Hubbardston
* McIntosh's Red
Late Winter Apples
* Baldwin
* Greening
* Northern Spy
By planting the different apple varieties that form at different times of year will enable you to eat apples throughout the year.
However, growing apples takes patience as they take a long time to bear. Standard apples will take 5-8 years to bear and many take as long as 10 years before they are fully producing.
Once mature however, your tree will yield on average, and again this depends on the variety, 5 - 20 bushels of apples per year.
There are some insects that will fight you for your crop and one of the worst is codling moth.
Codling moth or apple worm as it is sometimes known is a curse to the apple farmer. Once the apple blossom has started to fall towards the end of April, early May the codling moth larva or apple worm will soon appear to eat its way into the blossom end of the apples.
Spray your apples with neem or something similar when the blossom starts to fall, and then again in mid-summer to combat the second lot of codling moth that will appear at this time.
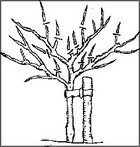
If you are against spraying of any kind, plant nasturtiums around your apple trees as this will help control the worms, as well as placing bands of corrugated cardboard around the trunks of the trees.
The caterpillars or worms will lay their eggs in the cardboard and these can be removed and any eggs, worms and cocoons destroyed. Replace the cardboard often, especially if the weather is wet and humid.
I have a lovely old apple tree that is free from codling moth using natural methods of control. I have trained nasturtiums to grow up the trunk of the tree by planting a mass of them at the base, interspersed with chives. For me, this works like a charm!
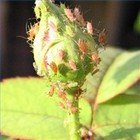
Examine your trees and look at the spaces between the flower stalks. If you find these crowded with greyish, white insects that make a sticky fluid that looks slightly grey, these are your apple suckers.
What these horrible little insects do is to suck all the juice from the blossoms to such a degree that the tree becames unable to produce any fruit. They might become so prolific in the trees that they eventually start eating the leaves as well.
If you find apple suckers in your apple trees treat them immediately with a dousing of homemade nicotine spray.
2) When the leaves being to come out but before the blossom opens. Spray for scab and leaf spot, Curculio and leaf-eating caterpillars.
3) Spray immediately after the blossoms have fallen and before the calyx cups close. Spray for leaf spot, sooty fungus, plant lice, codling moth and Curculio.
4) Spray 8 - 9 weeks after the last spray. Spray for bitter rot, blotch, a second spread of scab, caterpillars, and a second brood of codling moth.
Nothing that is eaten should be sprayed with chemicals. There are always healthier, natural options and we suggest you look at our article after reading this one on natural pesticides and insecticides.
Pruning is also important if you want to increase production, which seems a crazy notion, but it does work! Just make sure that your tree is more than 2 years old before you start pruning.
However, pruning is a necessity and should be done after fruiting when a light pruning is done, and again during the month of March when the tree is still dormant.
Cut out any dead wood and then prune the tree removing any branches that are growing inwards so that you open the tree to allow air and light in. Remove old and weak shoots and thin out any old spurs.
Cutting back the previous season's growth by about 2/3rds will encourage the formation of healthy new fruiting spurs. Cut back to just above the bud that is point in the desired direction of growth - usually outwards. Make all pruning cuts diagonal and close to the branch.
Don't cut off the fruiting branches. Apples mainly fruit on spurs that grow off old wood.
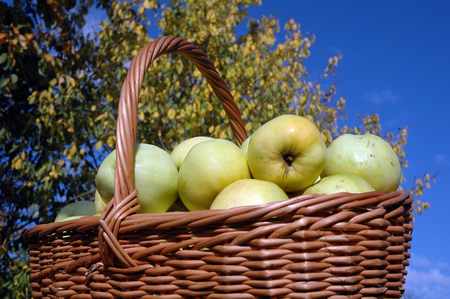
Harvesting time is around late September to early October
for winter
apples, depending on the variety of apples you are growing. Remove them
from the tree by hand when the fruit is ripe but not soft.
Do not pick your apples while they are still green. There is nothing to be gained from this. They won't keep any better by being picked green, and in addition you will find that by doing so your apples will lack their full flavor.
Instead pick them ripe and when they are dry, not after a spell of rain. The correct way to do this is to take the fruit in the palm of your hand and bend it upwards. If the fruit comes away cleanly from the tree without having to pull it, it is ripe.
There is another method in telling how an apple is ripe or not. And that is by cutting the apple open and examining the seeds. If they are brown, then the apple is ripe. However, if you open the apple and the seeds are white, then you will have to wait a little longer as your apples are not ready for picking.
To protect your apples from being bruised or damaged, place them carefully in a basket lined with staw and do not throw them into the basket. If you are going to make cider with the apples then you don't have to worry about how you pick them. The easiest method of getting the apples down is to simply shake the tree. However, never do this if you are going to store your apples.
Now place in a cool place until the weather is cold enough to put them into a root cellar. Apples are best stored when individually wrapped in a thin piece of paper. You can also store apples successfully in single layer slated boxes that allow for air to circulate over, around and under the apples.
If you have no option but to store your apples in barrels or in boxes other than in a single layer than you will have to store your apples in single layers for at least a week first, before storing them in the barrels and boxes.
However, storing your apples in single layers allows you to readily see how the apples are doing and whether they are spoiling in any way. If you do see any spoilage you can quickly remove the offending apple. If you store your apples in barrels and boxes, you will not be able to see this so readily and as a result if just one apple in the barrle turns bad, it won't be long before the rest will follow.
Apples are particularly sensitive to smells in their surroundings so never put apples in straw for this goes moldy your apples will take on the musty and moldy smell. Also, whatever you store your apples in, and where should be free from any strong smells that may be imparted to your apples.
If you find that some of your apples are spoiling while in storage remove these and with a small cider press you can use these to make your own apple cider. The early spring and summer varieties of apples don't make good cider because they lack flavor. However, the winter apples are perfect. You may want to remove the bruised or rotten bits from the apples before juicing, although some people don't bother.
Any apples that are beyond redemption can be given to the pigs and sheep who will be very grateful indeed for a change in their diet! Even poultry enjoy apples but they are best crushed before feeding.
However, if you store your apples in a cellar where the average temperature is just above freezing at about 30 degrees F. they will usually keep well as long as they were not damaged in any way during picking.
A storage recipe for apples that works well for us is to put your apples into a barrel or a wooden box that has a good layer of sawdust that as been made using a circular saw from well seasoned, hard wood. Make sure that your apples don't touch the sides of the barrel or box in any way. Place a layer of apples, followed by a layer of sawdust placed liberally between and over the apples for each successive layer. We find that storing apples this way, as long as the temperature is very cool, they last well into the following spring.
1) While it is usual to wait 6-8 years to get the fruit from standard apple trees with dwarf apple trees they start to bear only after 2-4 years.
2) The amount of fruit you get off the trees is plentiful and usually of good quality.
3) The size of the fruit is the same whether it has been grown on a standard or a dwarf apple tree.
4) Trees can be trained to grow along fences and walls, taking up very little room as a result.
2) A dwarf tree will live for about 25 years, while a standard apple tree will live to about 40 years.
They herald in spring with a show of blossom and are usually self-fruiting and make an excellent jelly, have good pectin for other fruits lacking in pectin for jam making, such as strawberries, and are good for bottling.
If you have a crab apple tree there is no need to thin the fruit as thining this variety will make no difference to the size of the final fruit.
Boil. Add apples and cook them in this syrup. Remove apples and put them in sterilized jars, pouring over the syrup. Seal. Additional additions to the syrup can also be ginger or lemon juice if desired.
Have ready your spotlessly clean bottles, jugs, or whatever, and caps. Pour the hot juice immediately from your pan into the preheated, sterile bottle and lid or cap at once with scalded lids or caps. Not set the bottle into a hot water bath of 165 degrees F. for 5 minutes. Next move the bottles to a tub or skink containing lukewarm water for 5 minutes. Then cool them down some more under cool, running water. The reason for such gradual heating and cooling is so that your containers won't break. The best caps are screw caps fitted with rubber gaskets rather than cardboard linings. The rubber gaskets give you a better seal.
Of course there are a number of things you can do with apples other than baking or canning. You can make fruit leather out of them, as well as make applesauce or even as dried fruit. It is a versatile fruit that is always in demand, and of course we all know that apples are very healthy for you. After all, "an apple a day, keeps the doctor away!"
Finally, we show you how to make your own apple cider!
In the end it comes down to where you live and what you want to do with the apples. However, whatever variety of apple tree you decide to plant, always buy two, even if they are self-pollinating, as they will definitely end up giving you more apples as a result.
It is spring now, as I write this article and my apple tree is just finishing its blossom. Beautiful sprays of delicate pink flowers appeared on the bare branches of the tree and in just a few weeks the flowers started disappearing and the leaves have started to emerge.
I was happy to see a number of bees and bumble bees in the flowers doing their thing for pollination, so I hope to have a good crop this year. Although we had time to prune out the dead wood, we weren't so quick on the mark for a good pruning, so no doubt the apples will be bountiful if not small. Hopefully, if I do some thining out as soon as the fruit appears, I may be able to save the situation.
Climates for Growing Apple Trees
So if you have a cold climate, during the winter months, this is the ideal time to put in your new trees from the nursery that are sold bare-rooted and dormant. And when I say a cold climate, I am talking about a climate where you get either snow or heavy frosts and have an average of about 1500 hours per year where the temperatures are below 10 degrees C.If you live in a warmer climate you can try growing good old Granny Smith apples which have a lower chilling requirement.
When growing apples find a sunny location which gets at least 6 hours of sun a day. This is essential if you want to be successful. I had read in the past that apples like to grow in soil that is well-drained. Well, we have clay, lots of it. It's a grey soil with a lot of stone and when it rains that clay retains a lot of moisture. And you know what? My apples and cherries love it!
Since then I have also learned that clay is good for pears and grapes, hay, wheat, oats, beets, cabbages and turnips. So don't be too hasty in getting rid of your clay soil and treating it with lime as one traditionally would. Clay soil makes great pasture and is also loved by my dandelions, nettles and sorrel.
Step by Step Instructions for Planting Apple Trees
Step 1. Take the apple trees out of the bags or containers and check the root systems. If you are happy then plunge the roots into a bucket of water for about 30 minutes. Add 10 ml seaweed solution to the water. This is good for transplantion shock and also gives the plant a good start.Step 2. For fruit trees you should dig a hole 4 feet in diameter and 2 feet deep for excellent growth. Add some compost and well rotted manure into the soil that you removed from the hole. Mix well to prevent the manure from burning the roots.
Step 3. Check the planting depth by standing the apple tree in the hole. Lay a stake across the top of the hole. The graft union should be just above the soil surface and level with the stake.
Step 4. Take the apple tree out of the hole, adjust the level of the soil if necessary and make a mound of earth in the base of the hole. Stand the apple tree on top of the mound. Make sure that there are no air pockets around the roots. The height of the mound should be adjusted so that the bud union (where the scion is budded onto the root stock) is slightly above or at soil level.
Back-fill the hole carefully with the soil that was removed from the hole. Firm the soil around the roots as you go. Apple trees like compacted soil and don't do well in loose soil at all.
Step 5. Water the apple tree well, adding more soil afterwards if necessary.
Do not add any fertilizer to the apple trees at this stage. Be patient and wait for the tree to show signs of growth before feeding.
You can cover the soil with some organic mulch. However, do not put it on or too close to the trunk as this will encourage disease.
If you want to save yourself some money you can buy 1 year old apple trees and plant them close together in October on a suitable piece of ground. A year later you can then remove the trees and plant them out into the orchard in their permanent position.
Growing Apple Trees: Watering and Feeding
Watering Apple Trees:
You will need to water your apple tree in the beginning making sure that you give it a steady supply of water. If it rains, nature will do the job for you. Once your tree is established it will probably not need any more help from you unless there is a severe drought.But watering young trees is important in the beginning as well as when the fruit is forming in the spring and early summer (or autumn for late maturing varieties) when the next season's buds are forming.
Fertilizing Apple Trees:
Besides water you will need to feed your apple trees to get good results. You need to feed your apple trees in spring and again in autumn. This can either be a good couple of spades of farmyard manure and well rotted compost or you can use a complete fruit tree slow release fertlizer.Fruit trees in general need nitrogen, phosphorus and potassium in addition to other minerals and trace elements.
- Nitrogen is essential for good leaf growth.
- Phosphorous is essential for root growth, flower, fruit and seed formation and fruit quality.
- Potassium is necessary for stengthening cell walls, protecting the tree from disease, and essential for good flavor, color and storage qualities.
In October top dress your apple orchard with a layer of compost and farmyard manure.
The compost will provide the much needed phosphorous. The manure, especially chicken manure, will provide the nitrogen needed for good leaf growth.
Using wood ash from those previous winter fires can be applied to your compost to give your trees the potassium your apples need. Apples need more potassium than other fruit trees.
Make sure that any manure and compost that you use on your trees has been well rotted and is no longer hot.
Growing Apple Trees in an Orchard

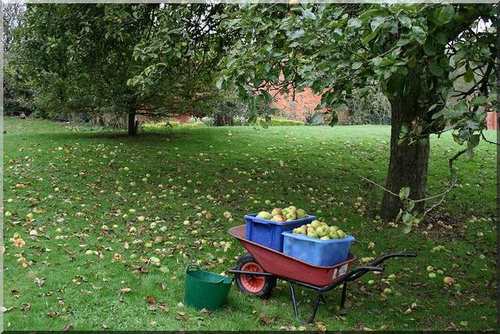
Windfallen apples in an apple orchard
When an orchard is being planned and planted it is important to have
trees of 2 varieties that bloom at the same time in order to secure
cross - pollinization, unless of course there are simalar fruit trees
close by in a neighbor's garden.Getting the spacings right is also another thing to take into consideration. If you are going to prune your apple tree into a pyramid shape then you should plant your apple trees 10 feet apart. However, if you are going to prune them in the conventional umbrella shape then you should plant your trees 20-30 feet apart depending on the variety you have chosen.
Because apple trees take such a long time to mature, it makes sense to intercrop your apples with vegetables, stawberries, currants or gooseberries until your trees mature.
Heirloom Apples
If you want to grow heirloom apple trees some of the great old varieties that you may still find if you are lucky are:Summer Apples
* Red Astrakhan
Autumn Apples
* Gravenstein
* Wealthy
Early Winter Apples
* Hubbardston
* McIntosh's Red
Late Winter Apples
* Baldwin
* Greening
* Northern Spy
By planting the different apple varieties that form at different times of year will enable you to eat apples throughout the year.
However, growing apples takes patience as they take a long time to bear. Standard apples will take 5-8 years to bear and many take as long as 10 years before they are fully producing.
Once mature however, your tree will yield on average, and again this depends on the variety, 5 - 20 bushels of apples per year.
Growing Apple Trees: Pests and Diseases
Codling Moth:

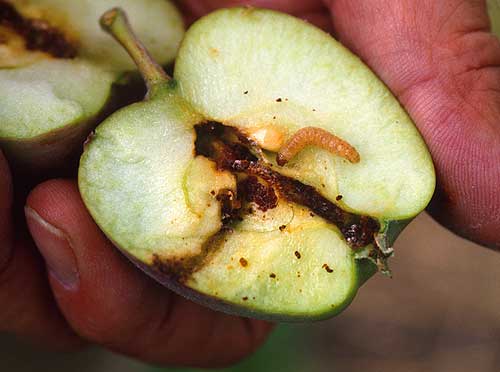
Codling
moth caterpillar eating its way through an Apple
There are some insects that will fight you for your crop and one of the worst is codling moth.
Codling moth or apple worm as it is sometimes known is a curse to the apple farmer. Once the apple blossom has started to fall towards the end of April, early May the codling moth larva or apple worm will soon appear to eat its way into the blossom end of the apples.
Spray your apples with neem or something similar when the blossom starts to fall, and then again in mid-summer to combat the second lot of codling moth that will appear at this time.
If you are against spraying of any kind, plant nasturtiums around your apple trees as this will help control the worms, as well as placing bands of corrugated cardboard around the trunks of the trees.
The caterpillars or worms will lay their eggs in the cardboard and these can be removed and any eggs, worms and cocoons destroyed. Replace the cardboard often, especially if the weather is wet and humid.
I have a lovely old apple tree that is free from codling moth using natural methods of control. I have trained nasturtiums to grow up the trunk of the tree by planting a mass of them at the base, interspersed with chives. For me, this works like a charm!
Apple Suckers:
The apple sucker can be just a bad a pest as the apple worm. If you see your trees in full bloom and suddenly you see the blooms turning a horrible dirty brown and falling without being fertilized or small fruit falling from the ground your trees probably are infested with the apple sucker.Examine your trees and look at the spaces between the flower stalks. If you find these crowded with greyish, white insects that make a sticky fluid that looks slightly grey, these are your apple suckers.
What these horrible little insects do is to suck all the juice from the blossoms to such a degree that the tree becames unable to produce any fruit. They might become so prolific in the trees that they eventually start eating the leaves as well.
If you find apple suckers in your apple trees treat them immediately with a dousing of homemade nicotine spray.
Spraying Apple Trees
Besides codling moth there are also a number of insects and diseases that attack apples during their growth.Time to Spray and for What:
1) In spring before the leaf buds open. Spray for scale and blister mite.2) When the leaves being to come out but before the blossom opens. Spray for scab and leaf spot, Curculio and leaf-eating caterpillars.
3) Spray immediately after the blossoms have fallen and before the calyx cups close. Spray for leaf spot, sooty fungus, plant lice, codling moth and Curculio.
4) Spray 8 - 9 weeks after the last spray. Spray for bitter rot, blotch, a second spread of scab, caterpillars, and a second brood of codling moth.
Nothing that is eaten should be sprayed with chemicals. There are always healthier, natural options and we suggest you look at our article after reading this one on natural pesticides and insecticides.
Pruning Apple Trees
Pruning is a must if you want to be able to pick your fruit with ease, rather than allowing them to grow to lofty heights that only the birds will get the benefit. People often fail to realize with they plant that tiny little apple tree that one day, without any pruning that apple tree will reach heights of 30 feet!Pruning is also important if you want to increase production, which seems a crazy notion, but it does work! Just make sure that your tree is more than 2 years old before you start pruning.
However, pruning is a necessity and should be done after fruiting when a light pruning is done, and again during the month of March when the tree is still dormant.
Cut out any dead wood and then prune the tree removing any branches that are growing inwards so that you open the tree to allow air and light in. Remove old and weak shoots and thin out any old spurs.
Cutting back the previous season's growth by about 2/3rds will encourage the formation of healthy new fruiting spurs. Cut back to just above the bud that is point in the desired direction of growth - usually outwards. Make all pruning cuts diagonal and close to the branch.
Don't cut off the fruiting branches. Apples mainly fruit on spurs that grow off old wood.
Harvesting Apples
Do not pick your apples while they are still green. There is nothing to be gained from this. They won't keep any better by being picked green, and in addition you will find that by doing so your apples will lack their full flavor.
Instead pick them ripe and when they are dry, not after a spell of rain. The correct way to do this is to take the fruit in the palm of your hand and bend it upwards. If the fruit comes away cleanly from the tree without having to pull it, it is ripe.
There is another method in telling how an apple is ripe or not. And that is by cutting the apple open and examining the seeds. If they are brown, then the apple is ripe. However, if you open the apple and the seeds are white, then you will have to wait a little longer as your apples are not ready for picking.
To protect your apples from being bruised or damaged, place them carefully in a basket lined with staw and do not throw them into the basket. If you are going to make cider with the apples then you don't have to worry about how you pick them. The easiest method of getting the apples down is to simply shake the tree. However, never do this if you are going to store your apples.
Storing Apples
It is easier to sort the apples while you are picking them. Good apples will go straight into storage. Apples that fall from the tree when picking will bruise later on so put those aside in a box. These can be used for home canning, apple sauce, pies etc. Those that have worm holes can be set aside and cut up for making cider.Now place in a cool place until the weather is cold enough to put them into a root cellar. Apples are best stored when individually wrapped in a thin piece of paper. You can also store apples successfully in single layer slated boxes that allow for air to circulate over, around and under the apples.
If you have no option but to store your apples in barrels or in boxes other than in a single layer than you will have to store your apples in single layers for at least a week first, before storing them in the barrels and boxes.
However, storing your apples in single layers allows you to readily see how the apples are doing and whether they are spoiling in any way. If you do see any spoilage you can quickly remove the offending apple. If you store your apples in barrels and boxes, you will not be able to see this so readily and as a result if just one apple in the barrle turns bad, it won't be long before the rest will follow.
Apples are particularly sensitive to smells in their surroundings so never put apples in straw for this goes moldy your apples will take on the musty and moldy smell. Also, whatever you store your apples in, and where should be free from any strong smells that may be imparted to your apples.
If you find that some of your apples are spoiling while in storage remove these and with a small cider press you can use these to make your own apple cider. The early spring and summer varieties of apples don't make good cider because they lack flavor. However, the winter apples are perfect. You may want to remove the bruised or rotten bits from the apples before juicing, although some people don't bother.
Any apples that are beyond redemption can be given to the pigs and sheep who will be very grateful indeed for a change in their diet! Even poultry enjoy apples but they are best crushed before feeding.
However, if you store your apples in a cellar where the average temperature is just above freezing at about 30 degrees F. they will usually keep well as long as they were not damaged in any way during picking.
A storage recipe for apples that works well for us is to put your apples into a barrel or a wooden box that has a good layer of sawdust that as been made using a circular saw from well seasoned, hard wood. Make sure that your apples don't touch the sides of the barrel or box in any way. Place a layer of apples, followed by a layer of sawdust placed liberally between and over the apples for each successive layer. We find that storing apples this way, as long as the temperature is very cool, they last well into the following spring.
Growing Dwarf Apple Trees
If you have a very small garden it may be wise to consider dwarf apple trees.Advantages of Dwarf Apple Trees:

1) While it is usual to wait 6-8 years to get the fruit from standard apple trees with dwarf apple trees they start to bear only after 2-4 years.
2) The amount of fruit you get off the trees is plentiful and usually of good quality.
3) The size of the fruit is the same whether it has been grown on a standard or a dwarf apple tree.
4) Trees can be trained to grow along fences and walls, taking up very little room as a result.
Disadvantages of Dwarf Apple Trees:
1) The standards produce the largest quantity of fruit per year, per tree once they get going.2) A dwarf tree will live for about 25 years, while a standard apple tree will live to about 40 years.
Growing Crab Apples
Crab apples are very different to the standard apples. These are very small fruit that is extremely tart when eaten. On the plus side they are extremely hardy and will survive in cold areas that even standard apples may have problems growing in.They herald in spring with a show of blossom and are usually self-fruiting and make an excellent jelly, have good pectin for other fruits lacking in pectin for jam making, such as strawberries, and are good for bottling.
If you have a crab apple tree there is no need to thin the fruit as thining this variety will make no difference to the size of the final fruit.
Here is a Recipe for Sweet Pickled Crab Apples that comes from Carla Emery:
Wash 2 gallons of crab apples and remove the blossom ends. Make a syrup of 1 quart brown vinegar, 3 pounds brown sugar, 1 teaspoon whole cloves and 1 stick cinnamon.Boil. Add apples and cook them in this syrup. Remove apples and put them in sterilized jars, pouring over the syrup. Seal. Additional additions to the syrup can also be ginger or lemon juice if desired.
Recipe for Pasteurising Apple Juice
Use your dairy thermometer to get the temperature right. Heat it to 170 degrees F and keep it there for 10 minutes. If a scum forms, skim it off. You don't want to get it hotter or keep it hot longer because you'll get a cooked flavor.Have ready your spotlessly clean bottles, jugs, or whatever, and caps. Pour the hot juice immediately from your pan into the preheated, sterile bottle and lid or cap at once with scalded lids or caps. Not set the bottle into a hot water bath of 165 degrees F. for 5 minutes. Next move the bottles to a tub or skink containing lukewarm water for 5 minutes. Then cool them down some more under cool, running water. The reason for such gradual heating and cooling is so that your containers won't break. The best caps are screw caps fitted with rubber gaskets rather than cardboard linings. The rubber gaskets give you a better seal.
Of course there are a number of things you can do with apples other than baking or canning. You can make fruit leather out of them, as well as make applesauce or even as dried fruit. It is a versatile fruit that is always in demand, and of course we all know that apples are very healthy for you. After all, "an apple a day, keeps the doctor away!"
Finally, we show you how to make your own apple cider!
Don't miss out on our latest news and articles. Sign up for our free monthly e-zine!
 |
Email Address First
Name (optional) |
Go from Growing Apple Trees back to Planting and Pruning Fruit Trees



New! Comments
Do you have something of value to add? Leave me a comment in the box below.